Tarp Camping 101
Why a Tarp?

In my quest to lighten my backpack I considered
and, at first, rejected the use of a tarp instead of a tent. I liked the idea
of a tarp, after all there are great advantages like;
- The openness: In a tent there is this dark wall between you
and wilderness that you came to experience. Yes, when it is not raining you
can remove the fly and enjoy the view through the screening that most tents
have now, but it is never going to be as open as a tarp.
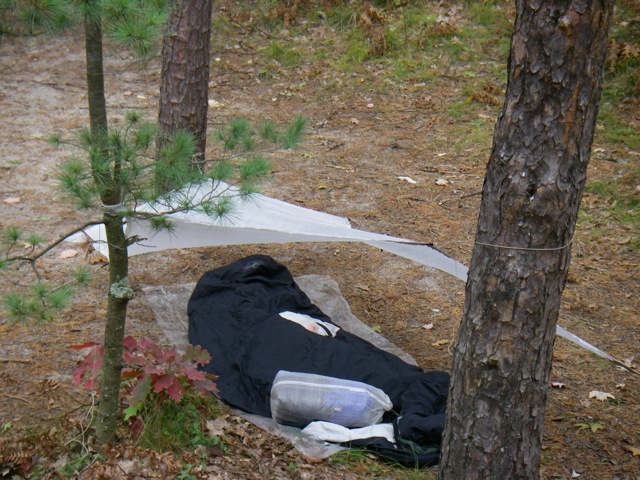
- Lightweight: I have several tarps ranging in weight from
under 5 oz. to just over 15 oz. including all tieouts. I carry a minimal plastic (polycryo) ground sheet, adding just over an ounce, and a 5 ounce bivy sack
with my sleeping bag. Most tarp campers use
their trekking poles or sticks from the forest to support their tarp so these
add no weight to their pack. Add 2-3 oz. for titanium stakes and you have a
very light shelter system.
- Handling rain: During a rain it is a quick and easy job to
erect your tarp and stow your pack beneath it With most tents, the tent goes
up first followed by the fly. So, unless you are really careful and skilled,
it is very likely that the tent will get wet before you get the fly up. You
are apt to get it wet again during take down. Setting up a wet tent is not
fun, but a tarp has no floor to get wet so setting up a wet tarp is not a
problem. While beneath your tarp, you don't normally come in contact with
the fabric anyway, so who cares if it is wet. It is also going to dry out
very quickly. Cooking beneath a tarp in wet weather is safe and easy, but
not recommended in a tent, unless it has an ample vestibule.
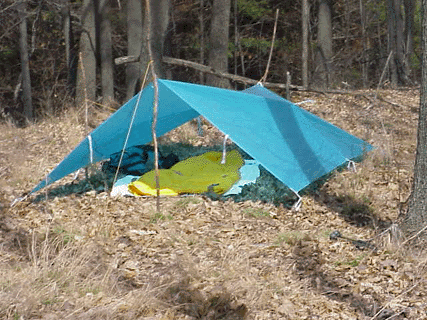
- Versatility: Unlike tents tarps can be set up in different
configurations. For example, I may pull out the tarp midday and rig it as
a simple roof over my head, then at night set it up in the usual A-frame configuration.
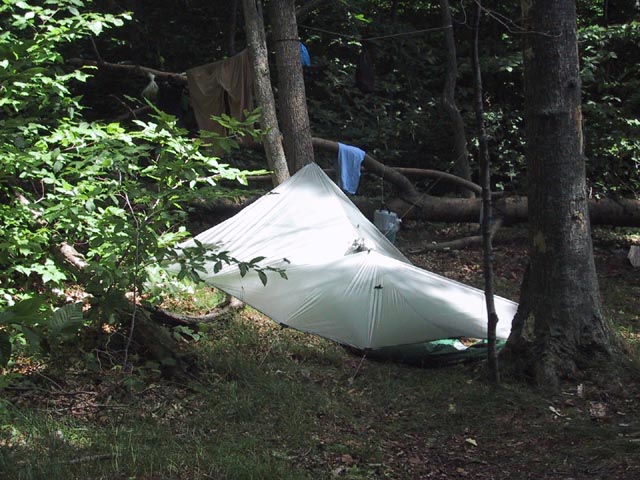
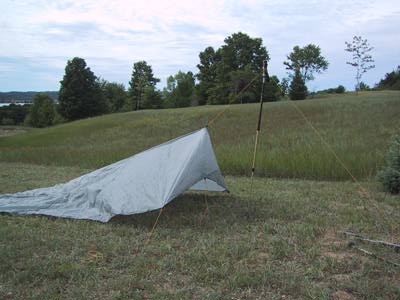
There are other configurations. Sometimes I modify the A-frame slightly, by lifting one corner (Photo). Here is a trapezoidal configuration that utilizes
one treking pole in front photo A quick
modification of this configuration is made by adding a second treking pole
in front (photo) resulting in a more
open setup with a wider view. Another possibility is to start with a corner
and create a wing configuration photo.
Here is a set up with a flat back and an A-Frame front. photo
So I was well aware of these advantages but held back because
of the presumed bug problem with a tarp (see Bug Protection),
and because I didn't really understand how to set it up in the A-frame configuration.
The A-frame is the most commonly used set up for night time shelter. The will
to use a tarp was there, so I practiced setting it up, but these early attempts
were pretty sad. Oh I could get it up all right, but it took forever, which is
not acceptable on the trail, and it seemed like there were a bazillion knots
to tie and untie. It wasn't until I read Ray Jardine's book, Beyond Backpacking
that I finally understood.
Tarp Sizes
As I have gained more experience I have gradually
reduced the size of my tarp. Combining the tarp with a lightweight, water
resistant bivy sack has been a great help here. On longer trips I am now using
a 5'8'' X 8' tarp/poncho combination photo.
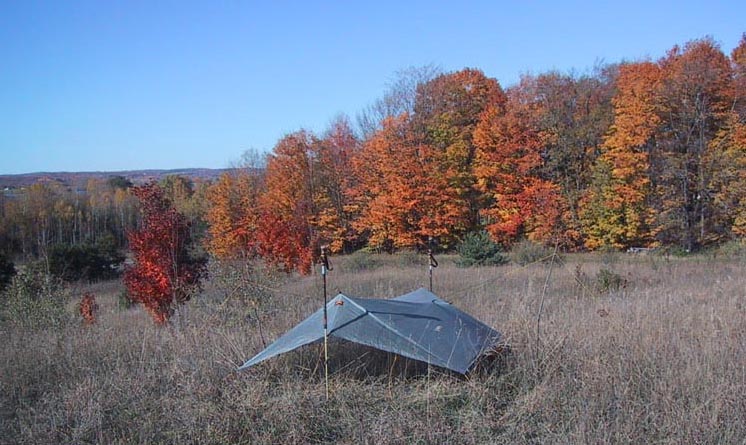
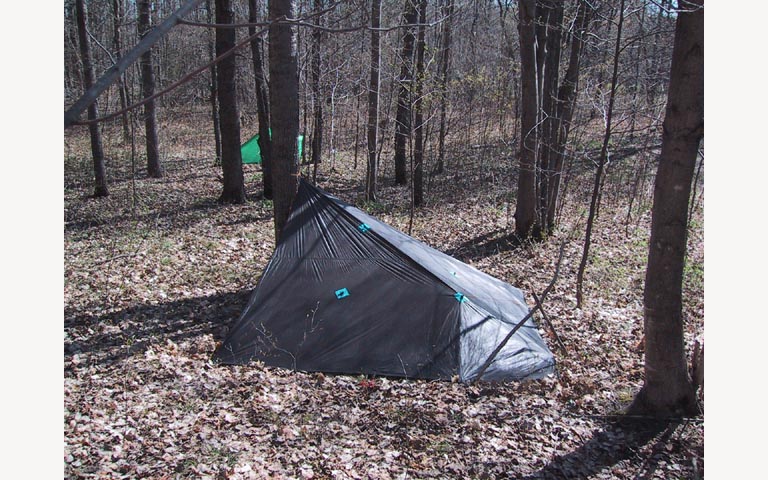
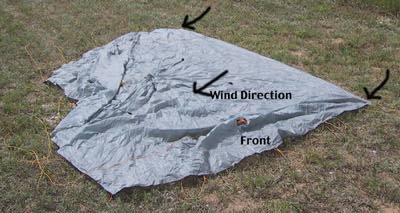
For shorter trips I still enjoy the luxury of the Golite Breeze Cave 1 (photo
at top of this page). It's 7' X 8.25' size is ample for one person. It also
has 17 inch triangular extension or beaks on the front and back which
help reduce the exposure to the elements of these otherwise large openings.
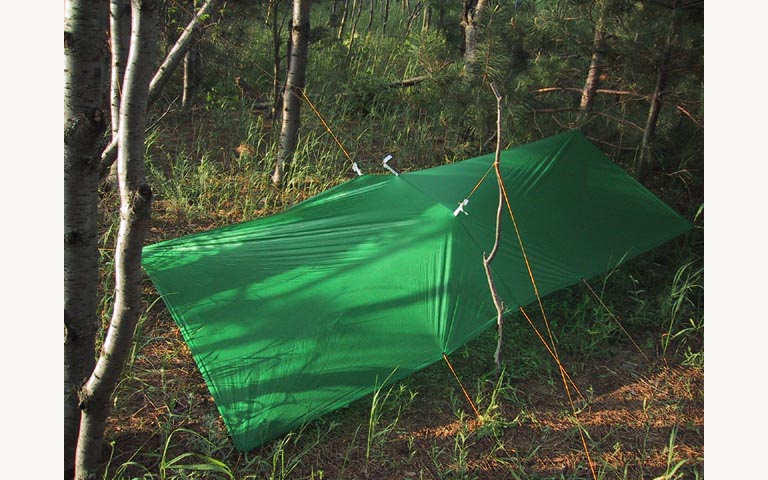
My first tarp was 8' X 10' in size and without the front and back extensions.
photo This was large enough that I did not
have problems with rain splashing in even without the beak extension's. I
also have a 6' X 8' tarp photo which
I like to use in cold weather with the more open configurations.
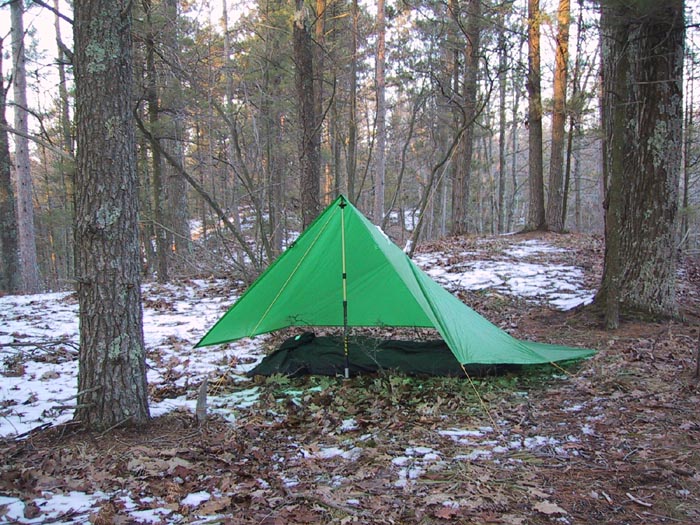
Setting up a Tarp as an A-Frame
I will attempt to explain the steps I have found
work for me in the set up of my present tarp.
Equipment List
- Golite Cave 1 tarp
- 12 titanium tent stakes. Most of the time there will be objects
to tie to (trees, rocks etc. ) and you won't use all of these.
- Trekking poles and two sticks four or five feet long or four
such sticks if you are not using trekking poles.
- Tie outs: The Cave comes with all these in place. They are,
however, very light nylon ribbon and line. I found that these had a tendency
to become tangled and were difficult to tie. So I replaced these lines, first
with Kelty Triptease Lightline, and later with venetian blind cord. The latter
is very light and I buy it by the foot at stores specializing in window accessories.
Knots: Tie-outs are attached to the tarp with a simple sheetbend. All stakes and poles are attached
with the clove hitch. Link
This is very simple to tie and when it is time to put the tarp away the knots
will simply fall apart when you slide them off the end of the stakes, or off
the end of your poles. This knot also can be loosened easily when you need to
slide it up and down a pole in order to find just the right height.
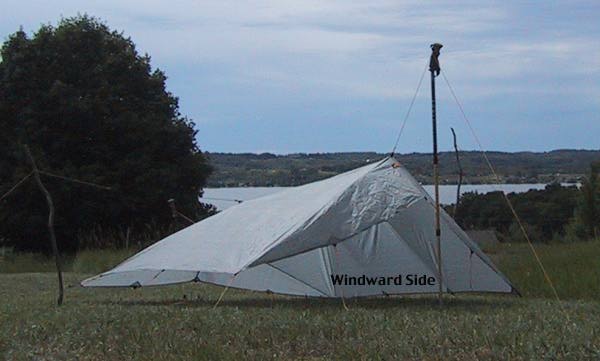
Set Up Variations: During a driving rain or just a strong wind
you can stake the windward side very close to the ground. With the Golite tarp
one also can stake the beak in back so that it touches or nearly touches the
ground. This is what I have done in the illustrations that follow.
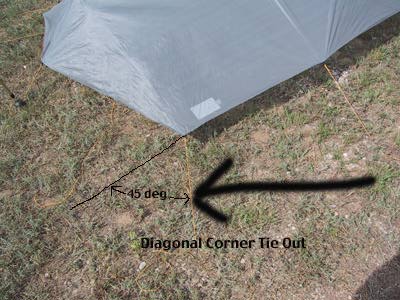
- Stake the two corners on the windward side first. Photo.
Pitch the tarp so the prevailing wind hits the side of the
tarp. I stake the back windward corner first. As far as I am concerned, when
these two stakes are in, the hard part is over. The tarp is not going to fly
away or flip back and hit you in the face. Corners should be staked diagonally.
Photo Stake the remaining two corners.
Place your stakes so that there will be slack available for the raising of
the ridgeline of the tarp. It may take some practice to gage this on the first
try. Until then, simply move the stakes closer together or farther apart as
needed when you raise the ridgeline.
- Attach the front tie out to your trekking pole with a clove
hitch and stake it out. Here is where you may need to adjust the distance
between corner stakes. The pole should be about 2.5 feet from the tarp so
that later you will have room to attach the beak to the pole. First tie a
clove hitch on the pole, then tie another on the stake and push it into the
ground. It is not necessary to push your pole into the ground. Photo.
It is tough to place the corner stakes diagonally at this time,
so don't worry about it now as you can reset them later.
- Go around to the back and repeat the process that you just
completed in front, attaching and staking the back of the tarp. Photo
- Attach and stake the side lifters, then the two stakes on
each of the windward and leeward sides, and attach the beaks to your trekking
poles. Photo,
- Go around and check the corners and reset any stake lines
that are not diagonal.
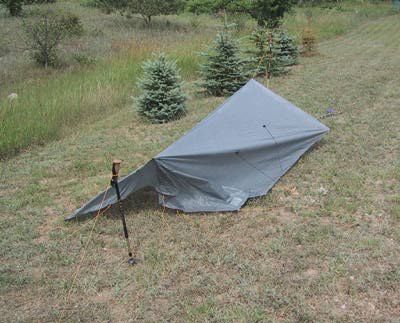
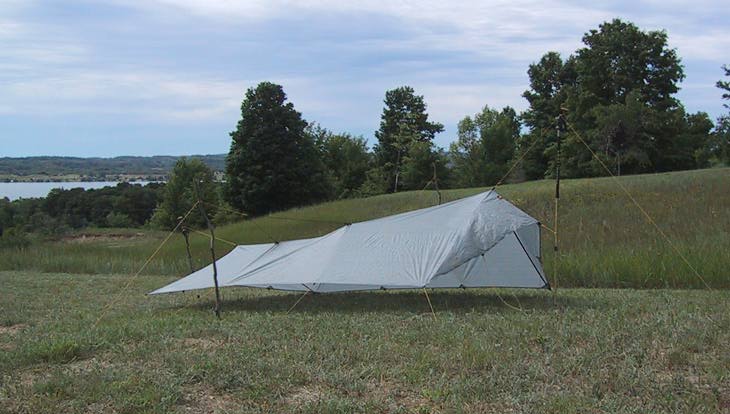
Finished set up Photo
.
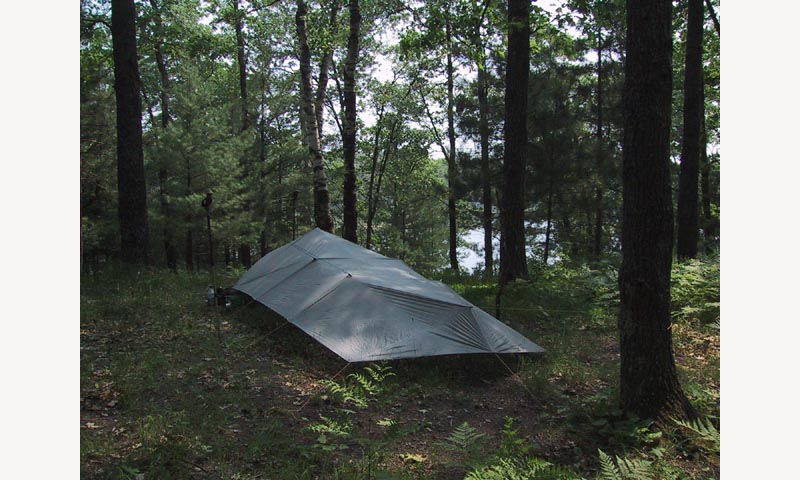
Finished view from the back. Photo
There are two more tie outs on each beak that are there if you
need them. I have yet to use them.
More Tips:
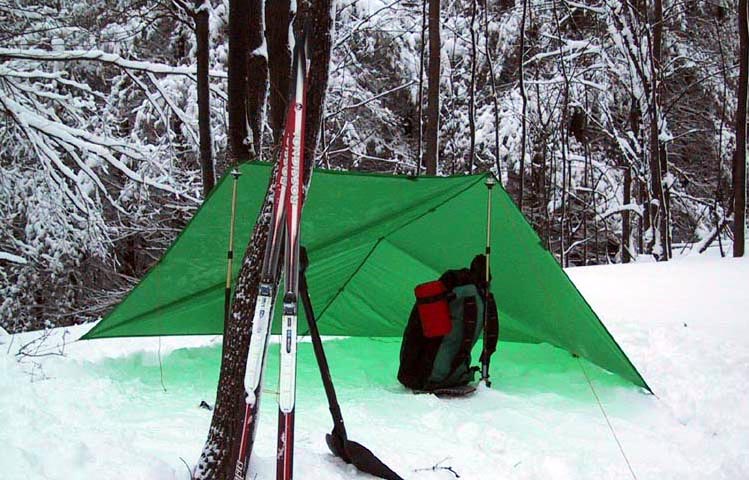
If there are trees 15 - 20 feet apart or even one tree the job
of setting up the tarp is very simple. Attach the front and back guy lines to
the trees at the height you choose ( I always have the front higher than the
back), stake out the corners, attach the lifters on the sides, stake the sides
and you are done (photo). I generally
use a couple of quick release half hitches to secure the back to a tree, and
a tautline hitch in front. That way I can adjust the tension as needed.
My Golite tarp also works well with the open configurations
that I sometimes prefer - One Pole, Two
Poles
Some people like to use one line that is a different color than
all the other lines. This line, perhaps placed at the front ridgeline, makes
it easy to orient the tarp when first pulled out of you pack.
Taking It Down
- Basically reverse the set up process. I like to pull the
side stakes and lifters first, then the leeward corners, the ends next, and
finally the windward corners. I do this in the same order each time mainly
because it helps me keep track of the twelve stakes and, in a wind, the tarp
will not blow away.
- Pick up the collapsed tarp by grabbing the top in the middle
of the tarp. Raise the tarp at this point and all the lines will fall neatly
away at the bottom. Stuff it into its stow bag with the part you grabbed going
in first. This will prevent any air pockets from forming. When you get to
the edge of the fabric all the guy lines will be together. I coil these around
my hand and place the coil in the bag last. The next time you pull out the
tarp, chances are very good that there will not be any tangled line. Another
possiblity is to remove all lines. In this case attach all lines to the tarp
with the loops described above so they are easily removed and reattached.
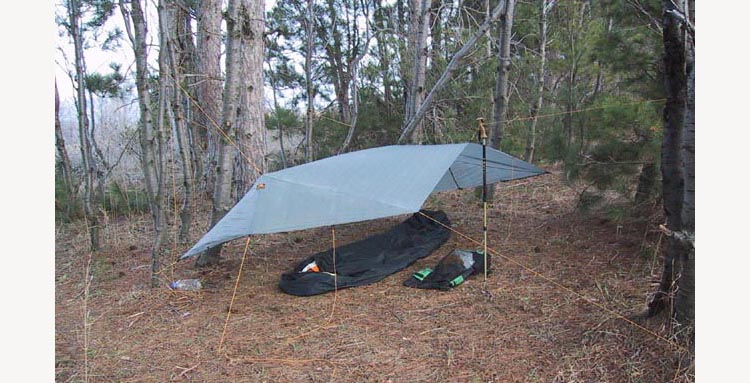
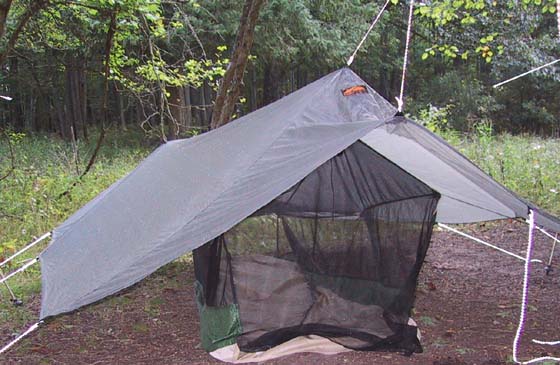
Bug Protection: The Nest 1
The Golite Cave 1 is designed to work with the Nest1, a net
tent that can be set up inside the Cave, and which attaches to it's tie out
points. Photo The Nest is 2' X 7' and weighs
about the same as the tarp itself (13.5 oz). The advertised dimensions must
be an average, at least for the width, for it is widest at the front and narrows
toward the back. It has it's own floor eliminating the need for a ground sheet
and instead of a zippered door, the netting at the door overlaps the floor.
I found this to work well enough and eliminating the zipper keeps the weight
down. I practiced setting this up three times before I was happy that this was
going to be practical on a trip. I'll try to describe the set up and offer some
tips based on my experiences.
- Set up the Golite Cave
- Take the Nest out of it's stow sack and lay it in the tarp
with the floor down and the door at the front.
- Attach the front: There are three cords with s-hooks at their
ends which attach to the tie outs on the tarp, one at the top and two for
the sides. There are barrel stays to tighten, but don't bother yet.
- Crawl inside and all the way to the back where you repeat
the process of attaching the s-hooks to the top and sides. You don't want
to come back here again, so tighten the barrel stays. I found that these do
not stay tightened by themselves, the barrel slides on the cord making these
stays quite useless. My first fix for this was to attach an alligator clip
on the cord next to each barrel. This effectively holds the barrel in place,
but means you must add 8 alligator clips and about an ounce of weight to your
gear list. Now I simply tie a slip
knot (hitching tie) next to each barrel and that holds it. Since it is
a slip knot all you need to do is pull on the cord to release it.
- Crawl back to the front and secure the barrel stays there.
- Crawl back to the middle and secure the two barrel stays
that attach to the sides. To get the tent positioned correctly, I found it
important to do the front and back before the middle.
- At take down time, leave your slip knots in place. From now
on set up should just be a matter of attaching the s-hooks which can now be
accomplished from the outside, ie. no need to crawl inside the tent.
Home