


Let's start with a before and after shot (note that the oil pan has not been refinished at this point):

My engine was running good, and the compression numbers were great, so I did not plan to do any major engine work. My plans were to clean it up, paint, and replace most of the gaskets and seals.
I decided to clean and paint the block before replacing the gaskets. I just thought it would look like a "cleaner" job not to have paint all over fresh gaskets. I used a variety of solvents, chemicals, etc. to get the engine clean. If I remember correctly, in order, I used:
Purple power degreaser from Wal-Mart to start. Cheap - $4 / gallon.
Aircraft remover to remove what little paint was left.
Wire wheel and 3M paint remover discs (worn down to smaller size).
More Purple Power.
Oven cleaner.
In the mix, I used a variety of wire brushes, tooth brushes, and a pile of rags. I also rinsed with water often.
Once I felt like I was almost there, I began going through the appropriate steps outlined by POR15 since I was painting with one of their engine painting kits. The next step was to use POR15's cleaner. After all the cleaning, the engine looked like this:


Note the block off plates I made for the oil filter bracket and fuel pump. With all the dirt, solvent, and water flying around, I didn't want anything to get inside. I just left the old gaskets in place to seal them.
I forgot to take any pictures after the 2nd step in the POR process, which is the Metal Ready. After rinsing with water, it leaves a unique finish on the block.
Next I coated the block with 2 coats of regular POR15. Note that I did not coat the side cover, or the timing gear cover at this time. These were removed later, sandblasted, and then coated.


Skipping ahead a little, here is the engine back in the frame.
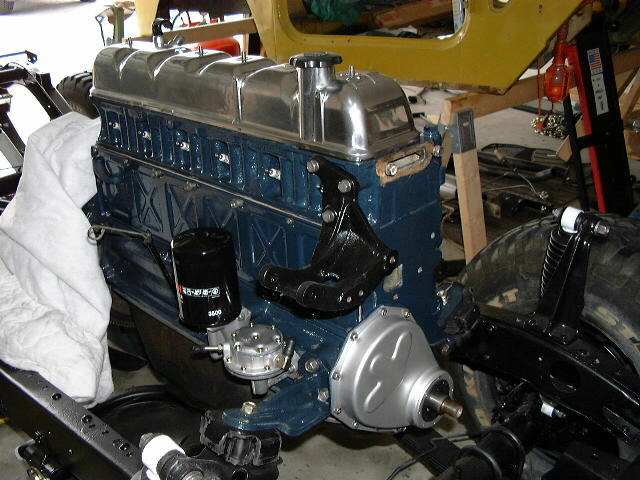
At this point, it has been coated with two coats of PORs engine enamel. The valve cover has been polished. I installed a Speedi-Sleeve on the crankshaft pulley before reinstalling (not shown). The fuel pump has been replaced with a new unit (OEM). I've started using 3M Scotchbrite discs to clean any gasket surface before reassembly. These discs chucked in a small rotary air tool can really make a nice sealing surface:

This is a picture of my intake manifold after some glass bead blasting.
![]()
Here I have test-fit my new SOR 2-piece headers.
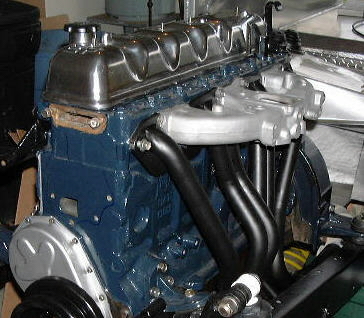
The flange thickness of the header and the intake did not match up. I had a guy machine the flanges to match.

Here the headers have been ceramic coated by a local shop and installed using 2 Felpro gaskets. For this type of coating, please check out my friends at Nitroplate. Ask for Troy or Mike and let them know you heard about them from Chuck Smith's website. They are good friends of mine and will treat you right.

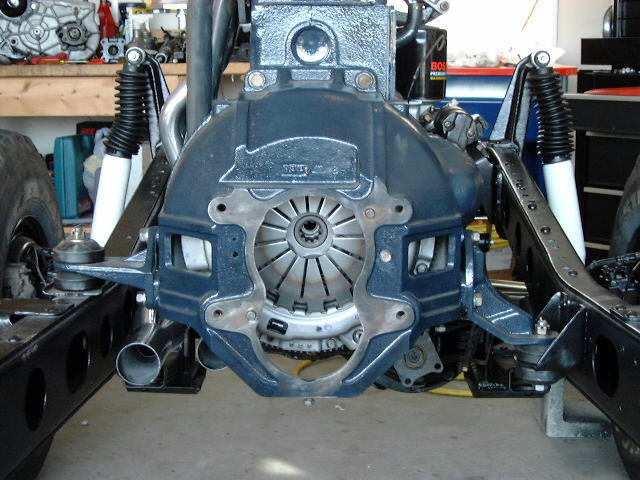
The flywheel has been resurfaced and reinstalled along with all new clutch components:

Here are a few more pictures of the engine with some more components added:

