| Home |
Mitsubishi Technical Page | Brake Service | Car Pictures | Pictures of People | IRSI Canada Challenfe "In the Pits" | Scenic Photos | Challenge Canada 2002 | Manifold Porting | Motorcycles | Contact Us
Mitsubishi 2 Piston "Big Brake" Service VFAQ
The purpose of this page is to assist those who wish to perform their own brake service on the Galant Vr-4 and other Mitsubishi Models equipped with the 2 piston front calipers. There are several pictures to aid in the installation of new front brake pads and rotors. Enjoy!
Credit to Tom Stangl for creating the original and only VFAQ: learn to fix your Mitsubishi at www.vfaq.com
-Alex Grabau
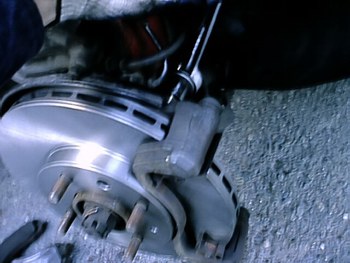
Above is a blurry but effective picture of the brake pad housing after the removal of the two slider bolts on the back of the caliper. To remove the brake pads and piston body, one must only remove the two 17mm bolts (whose heads face inwards) on the back of the piston body. The top half of the brake caliper can then be gently pried off the pad housing.
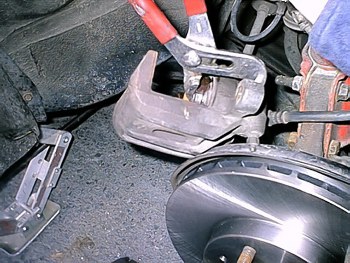
As you can see above, the rotor is still "trapped" inside the housing. This rotor has been relpaced already however, to remove and relpace the old rotor, the same steps muts be taken. To remove the brake pad housing, remove the two 17mm bolts that attach this piece to the hub. The wrench in the picture is attached to the upper of the two bolts at this time.
After the brake pad housing is off the car, it's time to remove the rotor. The rotor, on an old car will be seized to the hub. Removing the rotor requires patience. The first step is to get the caliper out of the way and wire it to the strut with a coat hanger.
To remove the rotor: (several methods)
-Hammer it off (only if you are replacing the rotors!!) Tapping around the circumference until it's free is the best approach.
-Another, more civilised way to remove the rotor is to use two 12mm bolts in the small holes of the rotor which sit between the wheel lug holes. When you screw the 12mm bolts in (with some lubrication) they will push against the hub and pry the rotor free from the hub.
-Before installing new rotors, use anti-seize on the hub where it contacts the rotor so you can get the rotors off next time.
The above picture was taken after the removal of the "brake pad housing" and demonstrates the next step in our brake service. The new pads are a lot thicker than the ones we are discarding. It is therefore necessary to retract the caliper pistons before fitting the whole assembly back onto the rotor. I used a set of carefully placed "Channel Lock" pliers and sqeezed hard to retract the pistons almost flush to the body of the caliper. *be careful not to pinch the rubber boots during this process* (As list member Ren suggested, a good idea would be to use a large pair of C-Clamps to contract the pistons. It might lessen the chance of ripping a seal boot.
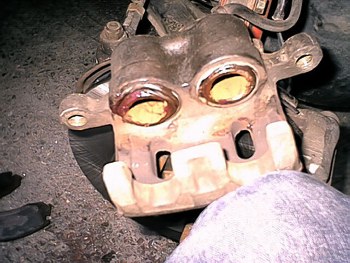
This is a good time to clean the caliper with a wire brush and lubricate the dried seals. I chose a NON-MIGRATING grease from Auto Zone. The grease must be resistant to heat so it doesn't travel onto the friction surfaces while you're racing about.
The caliper is now ready to be reinstalled. Unfortunately, it was late in the day and I didn't take some pictures that I should have. The following steps can now be taken to complete the brake job.
- Install the brake pad housing onto the hub and "load" the pads into their small metal clip holders. The pads will seat nicely and should not be difficult to push into their seats.
- After the pads are sitting in the housing, slide the piston body (with the pistons retracted) over the loaded pads. The body can now be bolted into place. Use more non-migrating grease on the long bolts that hold the piston body to the pad housing.
-Use anti-seize on all bolts
-Check all 4, 17mm bolts for tightness and reinstall wheel.
The brake pedal will need to be pumped several times to bring the pads to the rotor. The system is self adjusting and should not be bled unless you have replaced fluid or opened a bleed valve.
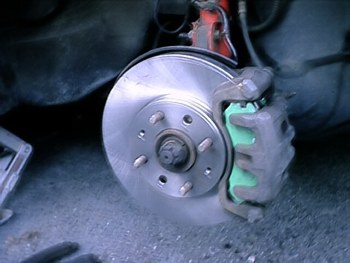
Ta-dah! Finished job. If you think this one out, it shouldn't take longer than about an hour even for a novice. Enjoy the brakes and drive safely.
Alex Grabau