PROJECT SIX-FACE/VASE + Lettering
OBJECTIVES:
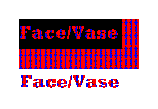
Students will draw a face in profile in Paint utilizing copy and flip.  This will result in a positive/negative picture.  Students will learn patterned lettering, suitable for greeting cards.
SUPPLIES:
Formatted 2SHD IBM compatible disk, Paint, colored printer and paper and mounting supplies.
PRELIMINARY REQUIREMENTS:
Part 1--Making the Face/Vase picture.

  1. Do not use the colors black or white due to the lettering project.  Click on a color such as brown. Click on the solid rectangle and draw a rectangle that fills the screen.
  2. Start about ¼ way across the top line.  Using the brush tool, draw a profile of a face facing right.  Begin with the forehead.  End at or under the chin about ¼ way across the bottom line of the rectangle with which you began.
  3. Select the profile portion of the picture.  Edit + copy and edit + paste.  Click on Image and flip and rotate horizontal.
  4. Drag to have faces facing each other without touching.  Line up the top and bottom with the rectangle.  Both faces should be inside the rectangle.  If necessary, widen the rectangle.
  5. Select fill.  Fill both faces with one color and choose its opposite color for the vase.  Save as Face1.
Part 2--Lettering with patterned letters (also used for greeting cards):

  1.   Click on the Dotted Rectangle.  Drag it to cover the whole Face/Vase picture.  Click on edit + copy.  Click on edit + paste.  Drag the copied picture to the side.  (If you make a different colored background pattern, do not use black in the pattern. Also do not color the background until the end.) Then click on Image + Stretch/Skew and replace the top and second blank with 10. Click on OK.  This will shrink the picture to one tenth of its size. 

  1.   Click on edit + copy and edit + paste.  Drag this copy next to the previous one to make a background.  Repeat this until the pattern is bigger. Then click on A (for alphabet) on your tool bar.  Drag the selection tool to make a rectangle which is slightly smaller than your patterned background.  Type the words FACE/VASE in this rectangle using black.  You may want to change the font size to 48.  Click outside of the Dotted Rectangle.  Now click on the Solid Rectangle and make it the size of the previous Dotted Rectangle.   Next click on the Dotted Rectangle and draw around the rectangle.  Be sure that the lower box on the tool bar is selected.  Then click on Image + Invert Colors.  Your letters changed to white with a black background.  Drag this on top of your pattern.  Position it.  Then click on fill (paint bucket) and the color white.  Replace black areas with white.  Click on the Dotted Rectangle and draw around the patterned Face/Vase lettering and drag the finished product to below the picture.   
PRESENTATION REQUIREMENTS:
Make a color printout and mount.  Hand in by the date stated. 
FINISHED FILE SAVE TO TEACHER'S MASTER DISK.
ART HISTORY:
The Chinese used positive/negative designs in their prints and in their cut silhouettes which were highly prized for their detail. During the Medieval period the Carolinian monks used calligraphy to record the Bible and other documents on velum including the book of Kells.

Diana J. Hunter, Instructor and editor, using Paint.  Adapted from a project by Eileen Allen and from projects by Caroline Craig.


GRADING SCALE:  Based on 100% of the project.  Each part is 25%.

Repeat Design  Mondrian  Butterflies  Tessellations 
Landscapes  Positive/Negative  Quilts  Radial Design
Home  Classes  Links


Email: dianajhunter@juno.com               
Last updated 12/27/02 Launch date 11/01/01 © 2001 
Permission granted for classroom or home use up to 100 copies.