Invicta Flies - Parachute Dry Flies, page 2
There are several ways of tying in the hackle for a parachute pattern. This is the way I've found that works best for me. Be sure to try other methods to find one that works best for you.
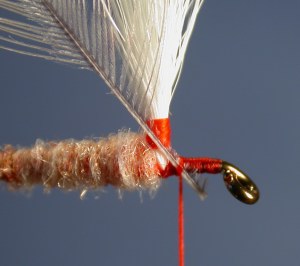
Select a hackle feather with fibers about twice as long as the hook gap. Usually there is a darker, dull side (the front), and a shiny, lighter side (the back). Hold the feather with the front facing you. Trim enough fibers from the right side to allow for tying in at the shank, with the first fibers at the top of the thread on the post (see photo). From the left side, remove twice as many fibers by stripping, pulling the fibers off the stem. This prevents too many wayward fibers being bent up into the post, and helps us get a clean start on winding the hackle. Use one turn of thread to attach the stem of the hackle feather in front of the post as shown at right. The front of the feather should be facing you, the fibers in line with the body/post.
|
 |
 |
Maintain tension on the tying thread and carefully, so you don't pull it out, rearrange the hackle feather to the far side of the post and immediately take two tight turns of thread. This little trick will preposition the stem for the spiral bend of wrapping the hackle.
|
|
Bring the tying thread up over the hook shank, then wind it
counterclockwise around the back of the post and the stem of the hackle feather, lashing the two together. As in you initial wrapping of the post, carefully wind the thread up, then back down for three turns. Pull the thread on the last turn to tighten, then wind the thread forward around the hook shank to cover the rest of the clipped end of the hackle stem. Bring the thread back to just in front of the post.
|
 |
 |
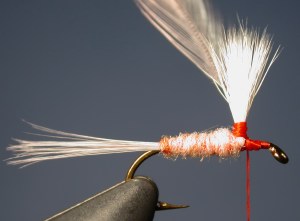
Grip the hackle feather near the tip with hackle pliers. Make sure the stem of the feather is clamped and not just the fibers, or the pliers will slip off as you're winding the hackle. Make your first turn of the hackle around the post at the top of thread base...bring the hackle feather counterclockwise around the front of the post, and continue around to the far side (see photo). Because we lashed the feather's stem to the post when we tied it in, it is already positioned at the top of the thread base. In addition, since we stripped the fibers off of the "inside" side of the feather, we created a flat surface on the stem, and this first wrap lays the stem directly against the thread with the fibers on the other side standing straight out, parallel to the hook shank.
|
This is our first turn of hackle. Make the next turn directly below the first, and the next below that one. Continue so you have a total of four turns of hackle.
|
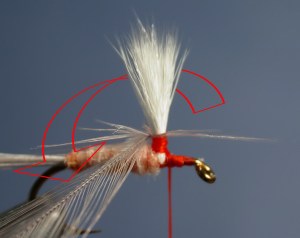
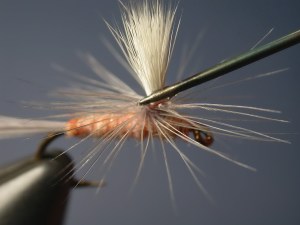
After you've made the fourth turn of hackle, bring the hackle
feather down on the far side, maintaining tension. With your left hand, gently stroke the wound hackle fibers up and back, and hold them tightly in place. Release your hold of the hackle pliers and let it hang, still attached to the feather.
|
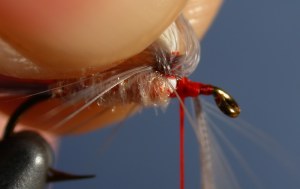 |
Take three fairly loose turns of thread, one in front of the other, around the hook shank and the feather to lash it down. Let the thread bobbin hang. Grab the hackle pliers again and pull the feather with even force (just enough that you don't loose the grip on the feather or break the stem). You may see the feather slide a little through the thread wraps, tightening the final hackle wraps. Maintain this tension, releases the fibers you've been holding back with left hand and use that hand to pull down on the tying thread. This tightens the thread and secures the hackle. Hold the pliers/feather in place as you again use your left hand to pull back the hackle fibers. Now you can remove the pliers from the feather. Take two tight turns of thread in the middle of the previous turns. Clip the excess feather close to the thread.
 |
Cover the exposed clipped end with the tying thread. Release your hold on the hackle fibers. If you like, you can add a drop of head cement to the tie-down area, letting it soak in, further securing the hackle. However, if everything has gone okay so far, this is not really necessary.
|
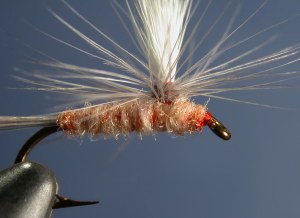
Apply some dubbing to the thread, enough to fill in the area
in front of the parachute post. Pull the hackle fibers back again and wind the dubbing onto the shank, working back to blend in with the dubbing behind the post, then forward to the hook eye. Take a couple turns of thread, then whip-finish. This can either be done with a tool, or you can hold the fibers and tie the knot by hand. Clip the thread and apply a drop of head cement.
|
 |
 |
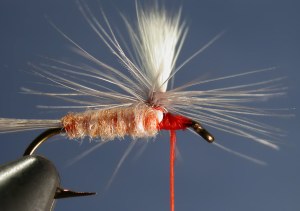
Manipulate the hackle fibers so any that are bent too far from the horizontal are repositioned, then add a drop of cement to the base of the post. This will soak down and further secure the hackle to the post.
|
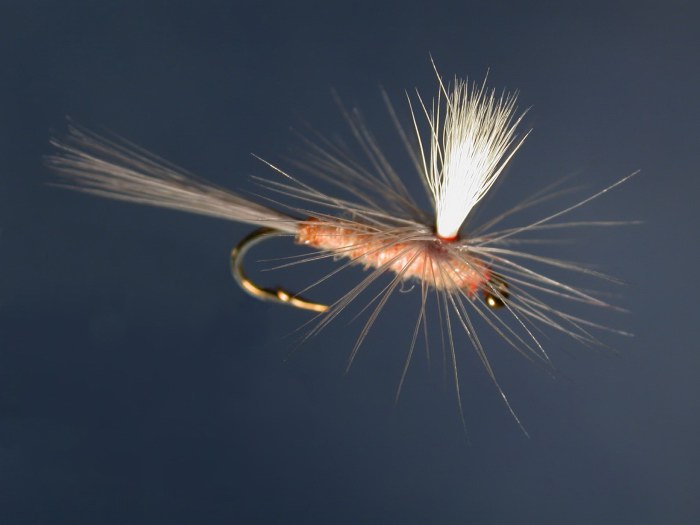
Now our parachute dry fly is complete. These techniques can be used to tie all parachute patterns, substituting different colors and materials to either suit the classic pattern, or to meet your own fishing needs. As with all techniques, practice greatly improves your skills, so be sure to tie a few, take notes, and you may develop some techniques of your own to make tying this pattern, or any other, an enjoyable, creative process.
THE END